Cloud Data Migration
|
If your question is not addressed below, contact us through our support form and we will get back to you shortly. |
|
| What is cloud data migration? | |
| How do I migrate data from another cloud service provider to IDrive® e2? | |
| What are the allowed patterns for excluding or including items for data migration? | |
| I have migrated my data to IDrive® e2. How does the IDrive® e2 ensure the security of my data? | |
| How do I migrate data from one region to another region of IDrive® e2? | |
In cloud data migration, you can move the data directly to the IDrive® e2 storage from your cloud storage provider without any additional tools. IDrive® e2 supports migration of source data from any S3-compatible storage, including AWS, Wasabi, and Backblaze B2.
To migrate data to IDrive® e2,
- Sign in to your IDrive® e2 account via any browser.
- Navigate to the Data Migration tab, and click Migrate data.
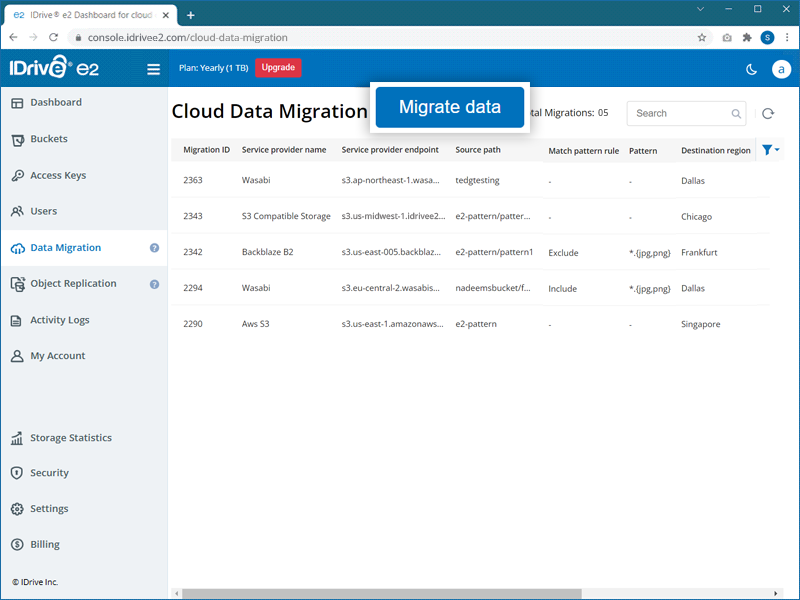
- Select a service provider - AWS, Wasabi, Backblaze, Google Cloud, Microsoft Azure, etc., from the dropdown.
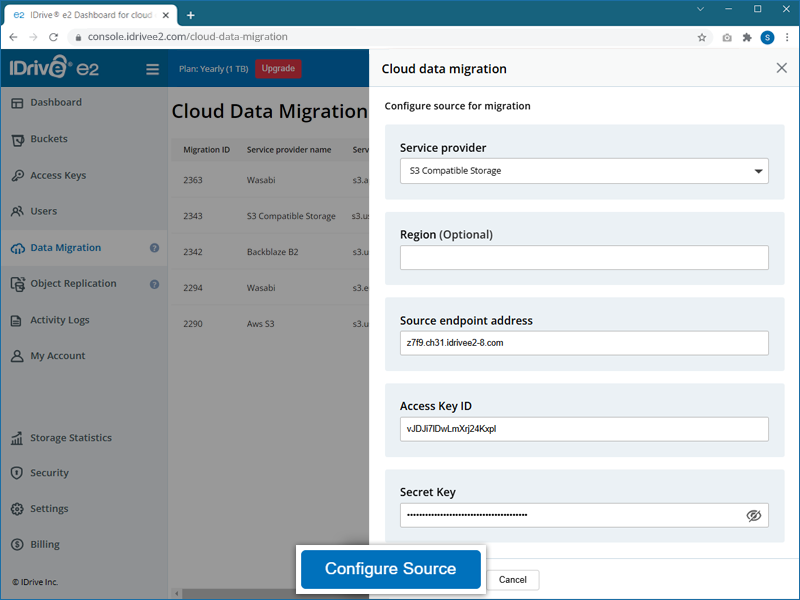
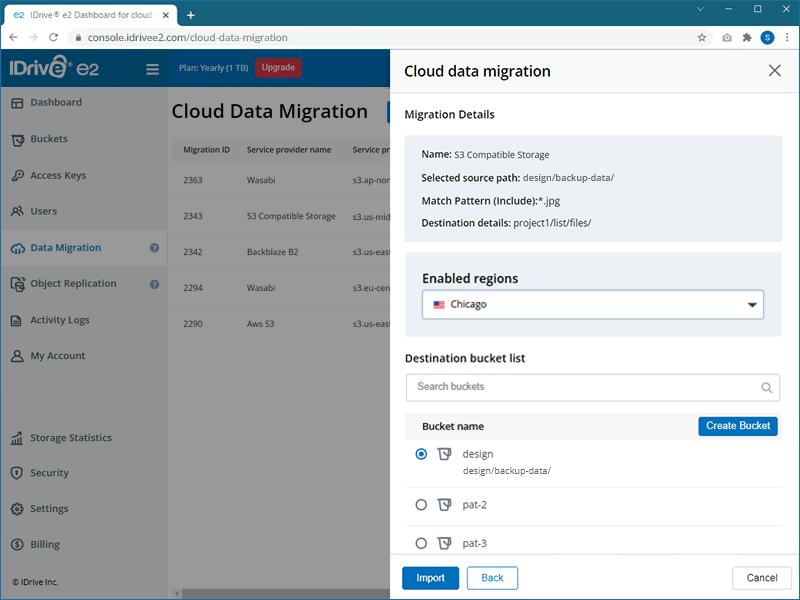
- Configure the source of migration by selecting the options as applicable:
- Access Key ID - Enter the access key for your service provider.
- Secret Key - Enter the secret key for your service provider.
- Source regions - Select a region from the dropdown or click Add Source Endpoint in the dropdown and add the source endpoint URL.
- Region (optional) - Select a region (optional) based on your requirements.
- Source endpoint - Enter the endpoint URL for your service provider.
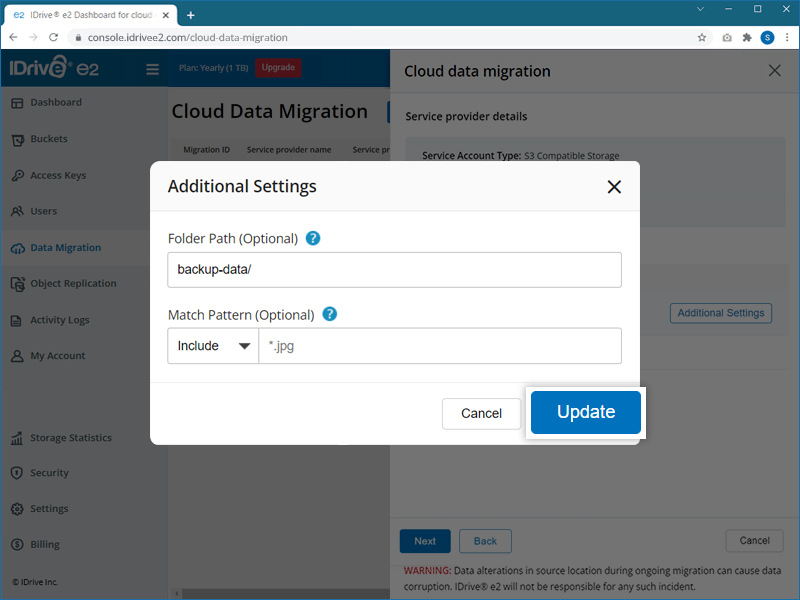
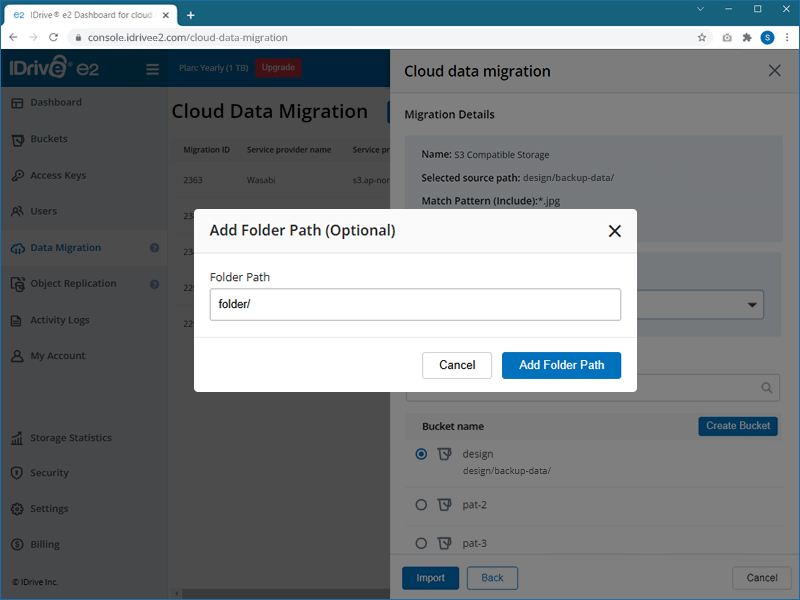
Note: If you need a bucket with advanced settings such as Quick Setup, MFA, or Bucket Audit Logging, use the Create Bucket option from the Buckets tab.
Note: If the folder does not exist in your destination bucket, it will be created automatically.
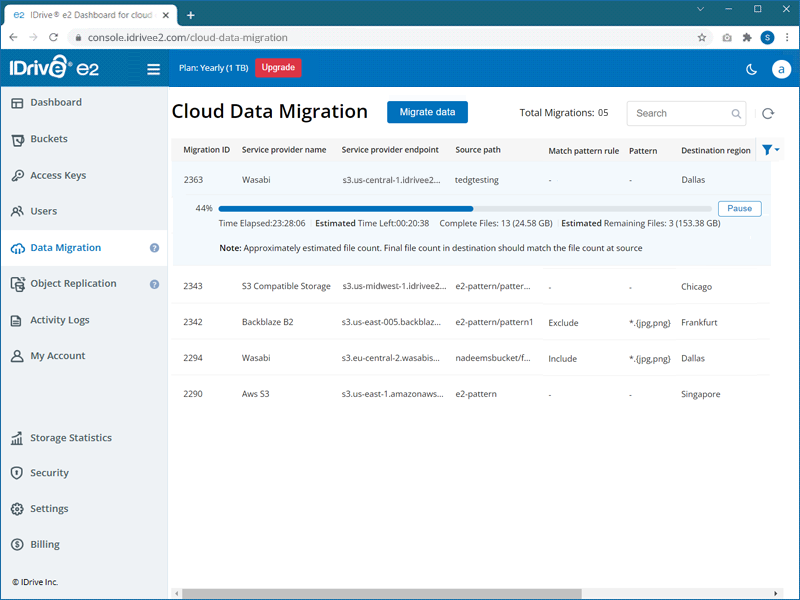
 , resume the migration by clicking
  , or delete the migration from the list by clicking
  . You can also restart a failed migration by clicking
  .
.Note:
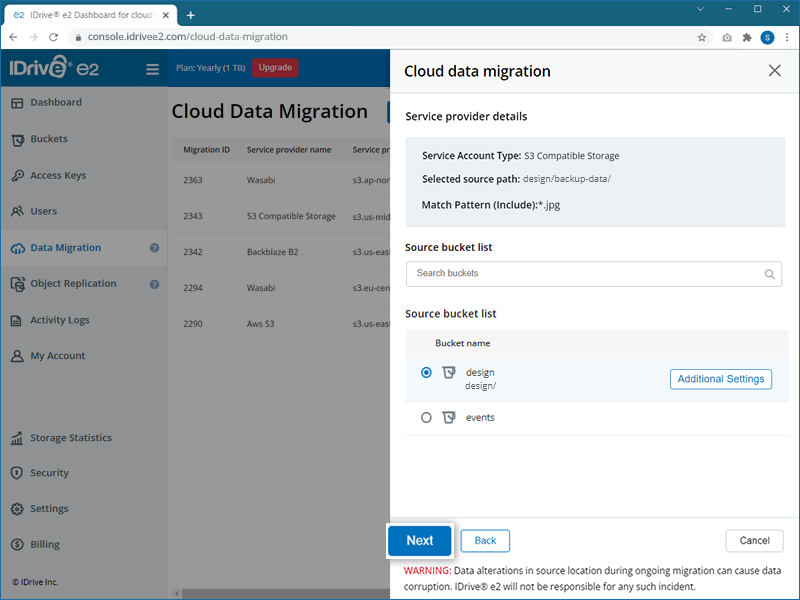
- Altering or modifying the data at the source location while the migration is ongoing can cause data corruption, and IDrive® e2 will not be responsible for any such incident.
- Only the latest version of objects will be migrated.
| Description | Pattern | Matches | Does not match |
|---|---|---|---|
| Wildcard | *.jpg | /file.jpg | /file.png |
| /dir/file.jpg | /dir/file.png | ||
| Rooted | /*.jpg | /file.jpg | /file.png |
| /file2.jpg | /dir/file.jpg | ||
| Alternates | *.{jpg,png} | /file.jpg | /file.gif |
| /dir/file.png | /dir/file.gif | ||
| Path Wildcard | dir/** | /dir/anyfile | file.pngf |
| /subdir/dir/subsubdir/anyfile | /subdir/file.png | ||
| Any Char | *.t?t | /file.txt | /file.qxt |
| /dir/file.tzt | /dir/file.png | ||
| Range | *.[a-z] | /file.a | /file.0 |
| /dir/file.b | /dir/file.1 | ||
| Escape | *.\?\?\? | /file.??? | /file.abc |
| /dir/file.??? | /dir/file.def | ||
| Class | *.\d\d\d | /file.012 | /file.abc |
| /dir/file.345 | /dir/file.def | ||
| Regexp | *.{{jpe?g}} | /file.jpeg | /file.png |
| /dir/file.jpg | /dir/file.jpeeg | ||
| Rooted Regexp | /{{.*\.jpe?g}} | /file.jpeg | /file.png |
| /file.jpg | /dir/file.jpg |
IDrive® e2 transmits all files using an encrypted TLS connection. Developers are encouraged to add their own encryption to their files before migrating them to IDrive® e2. They can also set Server-Side Encryption on IDrive® e2 buckets.
Data is stored in enterprise-class data centers equipped with state-of-the-art facilities, custom-designed elevated floors, HVAC temperature-control systems with designated cooling zones, seismically braced racks, and physical security features. The data centers are periodically audited by third parties for vulnerabilities in the network infrastructure.
In addition, IDrive® e2 uses a combination of object lock, versioning, and data retention features to protect against data loss from ransomware and accidental deletion or modification.
To migrate data from one region to another in IDrive® e2,
- Sign in to your IDrive® e2 account via any browser.
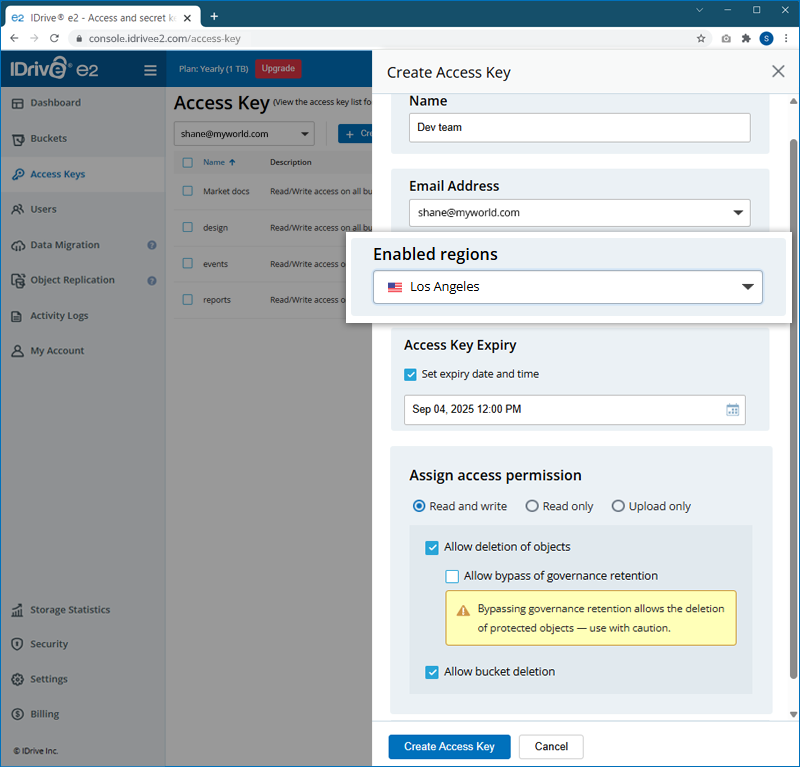
- Navigate to the Access Key tab and Create Access Key in the source region from where you want to migrate data.
- Navigate to the Data Migration tab, and click Migrate data.
- Select Other Cloud Object Storage from the dropdown.
-
Configure the source of migration by entering the details as applicable:
- Source endpoint address - Enter the endpoint URL.
- Access Key ID - Enter the access key.
- Secret Key - Enter the secret key.
- Region (optional) - Select a region(optional) based on your requirements.
- Click Configure Source.

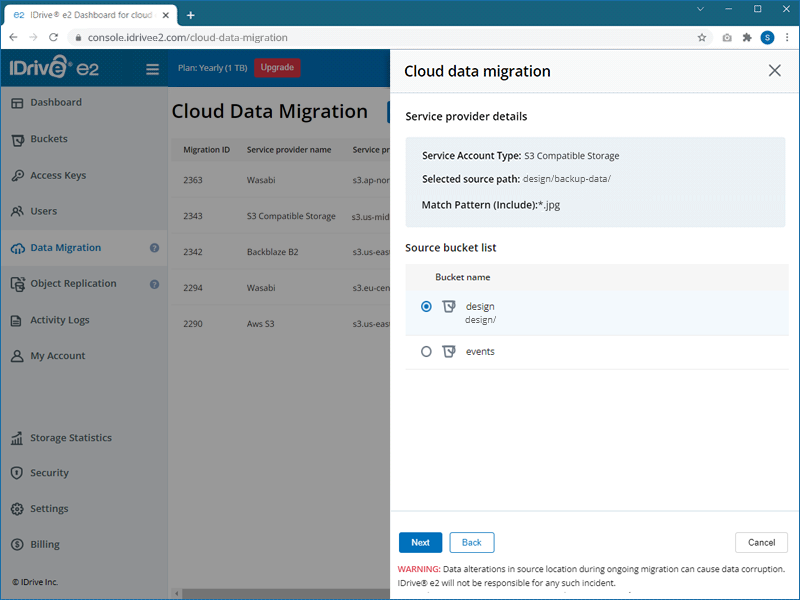
- Select the source bucket you wish to migrate, then click Next.
- Select the destination region and bucket for your data migration.
- Click Import.